You can maximize your workbench storage by building a custom tote frame underneath using 2x4s, which holds both large and small containers for organized bulk storage. Install heavy-duty drawer slides to add quick-access drawers, then repurpose dresser units as modular inserts for additional organization. Mount magnetic bars, small parts bins, and L-shaped holders on walls and under the bench for edge tools and accessories. Finally, add locking casters to make your entire setup mobile. Each of these solutions works together to create all-encompassing storage without replacing your bench, and the specific measurements and installation techniques will help you tackle this project effectively.
Key Takeaways
- Build a two-section tote frame from 2x4s sized 1/4 inch wider than your workbench for smooth sliding storage underneath.
- Install heavy-duty full-extension drawer slides with plywood mounting strips to create custom drawers that maximize under-bench storage capacity.
- Repurpose IKEA RAST dressers as modular drawer inserts positioned strategically under your bench for organized, stackable storage solutions.
- Add ventilation gaps and plastic liners between totes to protect contents from dust and moisture while using vertical space efficiently.
- Install locking casters on workbench legs to enable mobility, allowing access to wall storage and creating workspace for larger projects.
Assess Your Workspace and Storage Priorities
Before you build any storage system under your workbench, you’ll need to evaluate what you’re actually working with and what you really need to store. Start by doing workflow mapping, which means tracking how you move around your workspace and what tools you grab most frequently. This helps you position storage where you’ll actually use it. Next, conduct a lighting assessment to identify dark areas under your workbench that might need improvement. Consider your available floor space, ceiling height, and the weight capacity you’ll need. Document the types of items you’re storing—small parts, large tools, or totes—since different items require different organizational approaches. This careful planning prevents building solutions that don’t match your actual needs.
Build a Two-Section Tote Frame for Bulk Storage
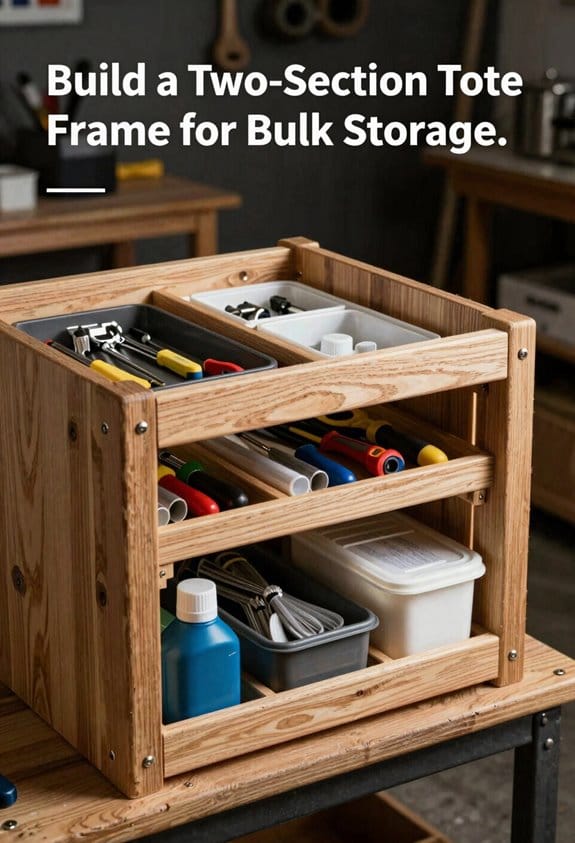
Once you’ve identified your storage needs, a tote-based frame system offers an efficient solution for organizing bulk items under your workbench. I’ll construct a frame using 2x4s cut to size, creating two distinct sections that accommodate different storage capacities. One section holds two 27-gallon totes, while the other contains three 14-gallon totes, maximizing your available space effectively.
When building this frame, I make it 1/4 inch wider than my workbench top for a smooth slide-in fit. I assemble the cabinet box using pocket holes and screws at the top, bottom, back supports, and middle divider for structural integrity. To preserve stored items, I guarantee ventilation gaps exist between totes and add plastic liners inside containers, protecting contents from dust and moisture while allowing proper air circulation throughout the storage system.
Install Drawer Slides to Organize Quick-Access Tools
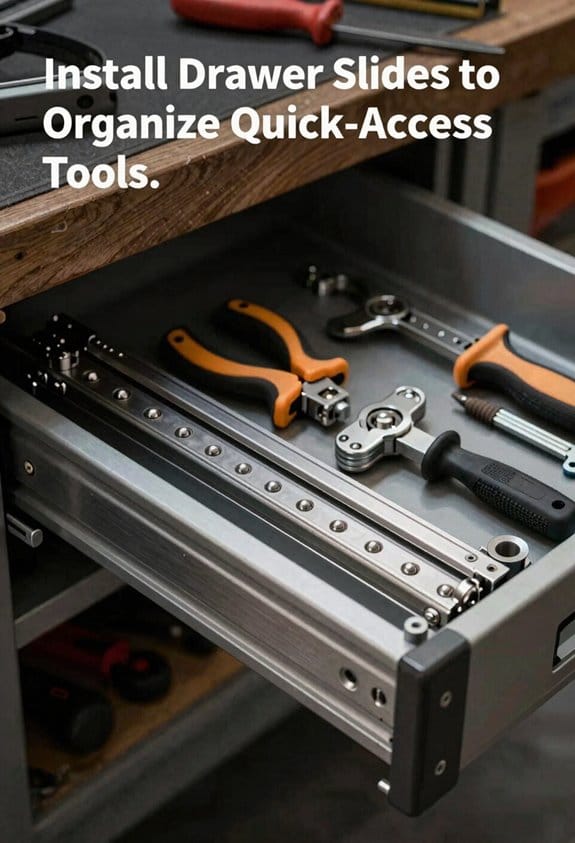
Adding drawer slides transforms your workbench storage from static bins to dynamic, accessible organization by enabling smooth-gliding drawers that keep your most-used tools within arm’s reach. I recommend using heavy-duty 30-inch full extension slides, which allow drawers to open completely for better access. Proper rail alignment is critical to guarantee smooth operation and prevent binding. You’ll need to fabricate L-shaped plywood mounting strips with countersunk holes, positioning them carefully on both the workbench underside and drawer units. Soft close mechanisms aren’t necessary but reduce slamming and protect tools. After installing the slides securely, slide four drawers into position. This setup dramatically improves your workflow by eliminating the need to reach deep into storage spaces.
Add Dresser Drawers as Modular Storage Inserts
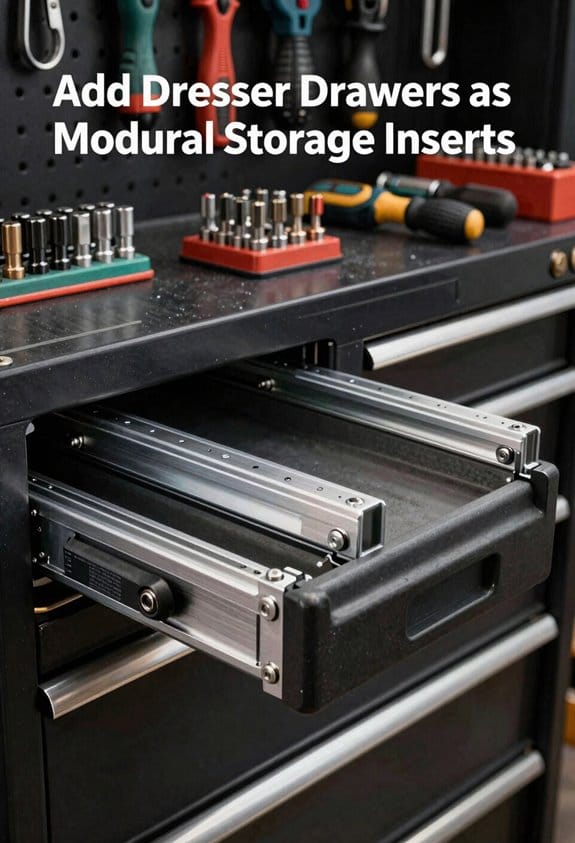
Transform your workbench storage by repurposing IKEA RAST dressers, which offer a practical and affordable alternative to custom-built cabinetry. These modular fronts slide easily underneath your work surface, maximizing space efficiency without permanent modifications. I recommend positioning two dressers on the left side and one on the right to balance open storage areas. Screw the units together for enhanced stability, ensuring drawers operate smoothly without obstruction. Reinforce the assembly by adding a 4×4 support beam across the front top and securing a ledge to your workshop walls. This configuration transforms RAST dressers into functional tool storage while maintaining accessibility. The modular design allows you to adjust your organizational system as your needs evolve, making dresser inserts an adaptable storage solution.
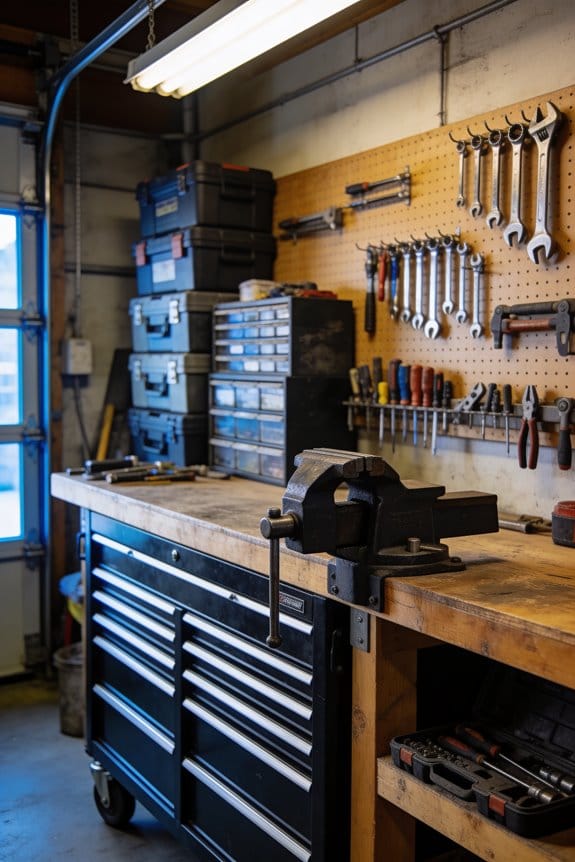
Mount Small Parts Bins and Magnetic Tool Bars
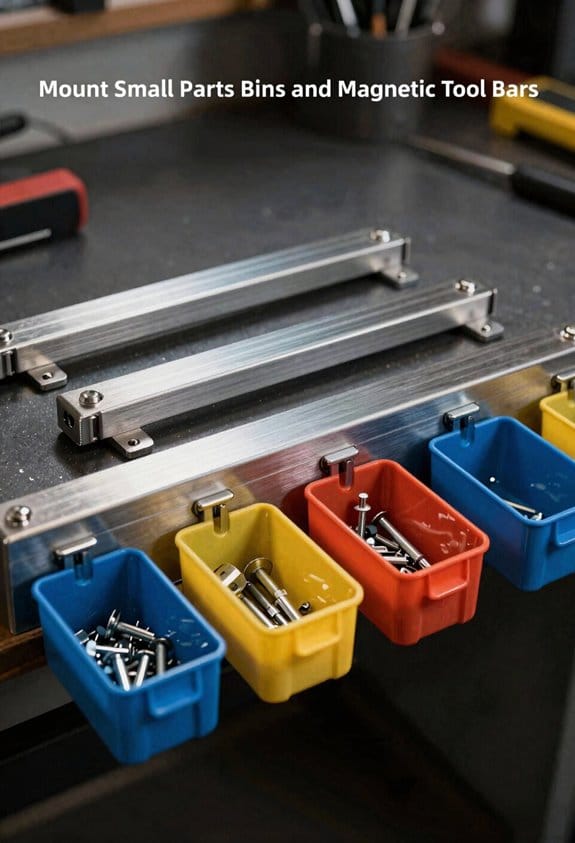
Small parts bins and magnetic tool bars work together to organize frequently used items, keeping them within arm’s reach while you work at your bench. I mount small parts bins directly on your workbench using their back mounting holes, which creates easy access to screws, fasteners, and components. You can choose big red drawer sets or smaller ESD parts drawer sets depending on your storage needs. Adding a magnetic bar above the bench holds knife-like tools securely. I recommend using label adhesives on bins so you’ll quickly identify contents without opening them. Make sure proper bin ventilation by leaving space between units, allowing air circulation that prevents moisture buildup and keeps your small parts in optimal condition.
Hang Holders Under the Workbench for Edge Tools
Mounted beneath your workbench, L-shaped plywood holders provide convenient access to edge tools like chisels, scrapers, and squares while keeping your work surface clear and organized. I attach these half-inch plywood holders to every workbench corner’s underside, positioning them strategically for easy retrieval. By placing speed square holders on opposite legs, I can access my tools from any side of the workbench. For edge clamps and corner chisels, this system prevents damage that occurs when tools scatter across surfaces. The holders accommodate various tool sizes and shapes, making them versatile storage solutions. Since I drill half-inch holes in scrap wood for dowel-based tape storage, I can integrate multiple holder types. This underside approach maximizes workspace efficiency while protecting my frequently used edge tools from wear and loss.
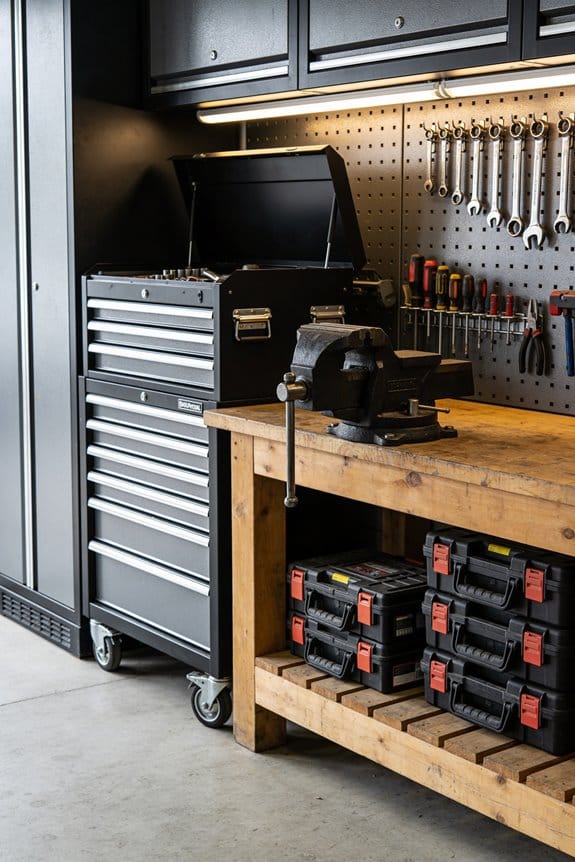
Move Everything With Mobile Casters and Totes
I can set up my entire workbench so it rolls wherever I need it in my garage or workshop, giving me the flexibility to reorganize my space whenever I want. Installing locking casters on the workbench legs allows me to move it easily, then secure it in place when I’m working. I’ll use stackable totes to store tools and materials underneath, maximizing vertical space efficiently. By choosing totes in different sizes—27-gallon and 14-gallon options work well—I can organize items by category or project type. The mobility feature proves especially valuable when I need to access wall storage or create workspace for larger projects. Locking the casters prevents accidental movement during use, ensuring stability and safety while I’m working.
Store Tape and Speed Squares in Easy Reach
Once your workbench is mobile and your larger tools are organized in totes, you’ll want to keep frequently used items within arm’s reach so you’re not constantly bending down or searching through storage. I’ve found that attaching L-shaped plywood holders to the underside of every workbench corner creates accessible storage for essential tools. Position speed square racks on opposite legs, allowing you to grab your square from any side without fumbling. For tape reels, drill half-inch holes into scrap wood and insert dowels to hold rolls securely. You can also cut a three-inch wood circle, glue it to PVC pipe, and countersink the assembly to your workbench lid. This approach keeps your most-used items immediately available, eliminating wasted time during projects.
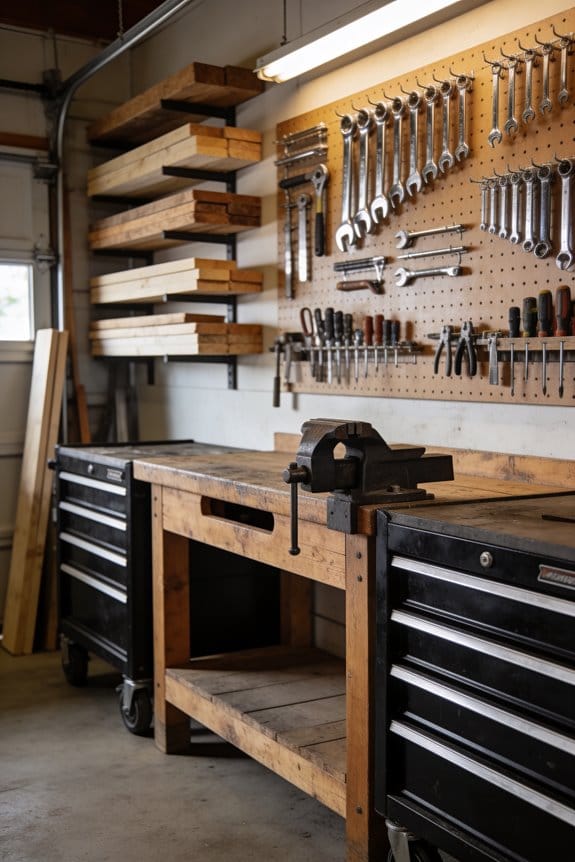
Maximize Vertical Space Without Losing Workspace
While you’ve organized your most-used tools within easy reach, your workbench surface itself remains valuable real estate that shouldn’t be cluttered with storage. I’ve found that vertical organizers and hanging shelves offer excellent solutions for this challenge. By mounting shelves above your workspace, you create additional storage without sacrificing the flat working area you need. Vertical organizers, which attach directly to your wall or pegboard, keep frequently used items visible and accessible. Consider installing hanging shelves at varying heights to accommodate different tool sizes. This approach maximizes your storage capacity while maintaining an unobstructed work surface. The key is positioning these vertical storage systems within arm’s reach but high enough that they don’t interfere with your projects or movement while working.
Frequently Asked Questions
What Weight Capacity Should I Ensure My Workbench Can Support With Added Storage?
I’d recommend ensuring your workbench’s load rating exceeds your storage weight by at least 50%. You’ll want a substantial safety margin accounting for the totes, drawers, and tools you’re adding underneath.
How Do I Prevent Drawer Slides From Sagging Under Heavy Tool Loads Over Time?
I’d say heavy tools are like anchors—they’ll drag you down if you’re not prepared. I install reinforced slides rated above your load and add side mounted supports on drawer units to prevent sagging over time.
Can I Combine Different Storage Methods Without Compromising Workbench Stability and Safety?
You can combine different storage methods safely by anchoring everything securely. I’d recommend using modular bins with back-mounting holes and magnetic panels for lightweight items. Screw heavier components directly to your workbench frame, distributing weight evenly across support structures.
What’s the Best Way to Anchor a Workbench to the Floor for Safety?
I’d anchor your workbench like roots gripping earth—use lag bolts into studs or concrete anchors into floors. This foundation prevents tipping when you’re loading storage underneath, keeping you safe while maximizing that valuable workspace.
How Should I Weatherproof or Protect Storage Components in a Garage Environment?
I’d recommend applying rust inhibitors to metal components and installing moisture barriers like silicone sealant on wood surfaces. You’ll want to store sensitive items in sealed containers and guarantee proper garage ventilation to prevent corrosion and degradation.