I organize my tool chest by first consolidating everything into one dedicated location, which eliminates search time during projects. I separate metric and SAE tools into distinct sections with color-coded storage—blue for metric, red for SAE—so I grab the right tool instantly. Drawer dividers group like tools together, while pegboards and shadow boards provide visual inventory that immediately shows what’s missing. High-value items like diagnostic equipment stay locked separately. Rolling carts let me transport grouped tools between job sites efficiently. This system keeps my workspace functional and accountable.
Key Takeaways
- Consolidate all tools into one centralized storage location with documented inventory checklists to eliminate workspace searching time.
- Separate metric and SAE tools into distinct sections using color-coded storage to prevent fastener mistakes and speed selection.
- Install drawer dividers grouping like tools together with standardized handle orientation for rapid identification and functional organization.
- Mount pegboards and shadow boards with tool-shaped cutouts near workstations to enable immediate visibility and accountability.
- Secure high-value diagnostic equipment in lockable cabinets and stock rolling carts with task trays for multi-location project work.
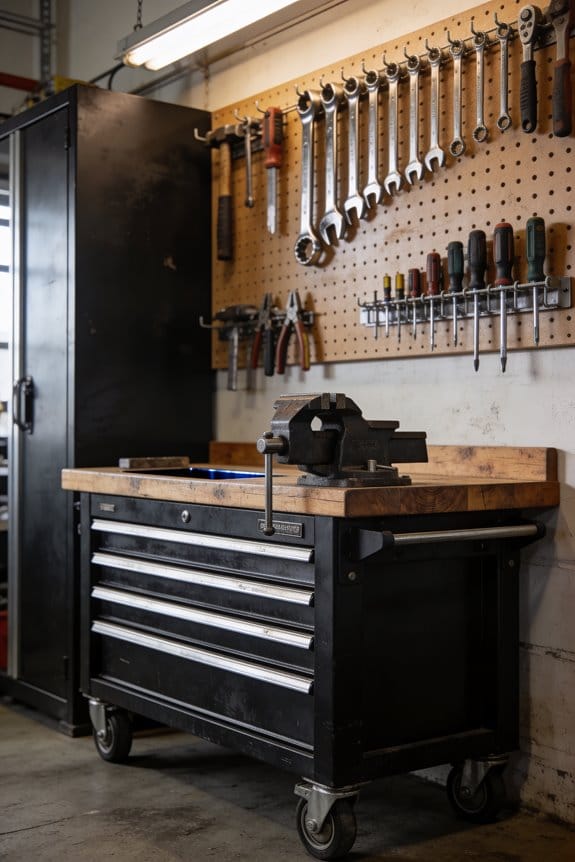
Start With One Location to Eliminate Search Time
If you’ve ever wasted fifteen minutes hunting through your garage for a wrench that should’ve been within arm’s reach, you’ll understand why mechanics begin their organization journey with a single, dedicated storage location. Consolidating your tools into one centralized inventory eliminates the frustration of searching scattered areas. This foundational approach works particularly well for beginning mechanics or those tackling occasional projects.
Start by creating an entry checklist—a simple list documenting what tools you own and where they belong. Once you’ve established your main storage area, you’ll immediately notice how much time you reclaim during projects. You’ll spend more moments working and fewer moments searching. This basic containment strategy prevents tools from disappearing throughout your workspace, ensuring everything you need stays accessible and accounted for.
Separate Metric and SAE Tools Into Distinct Sections
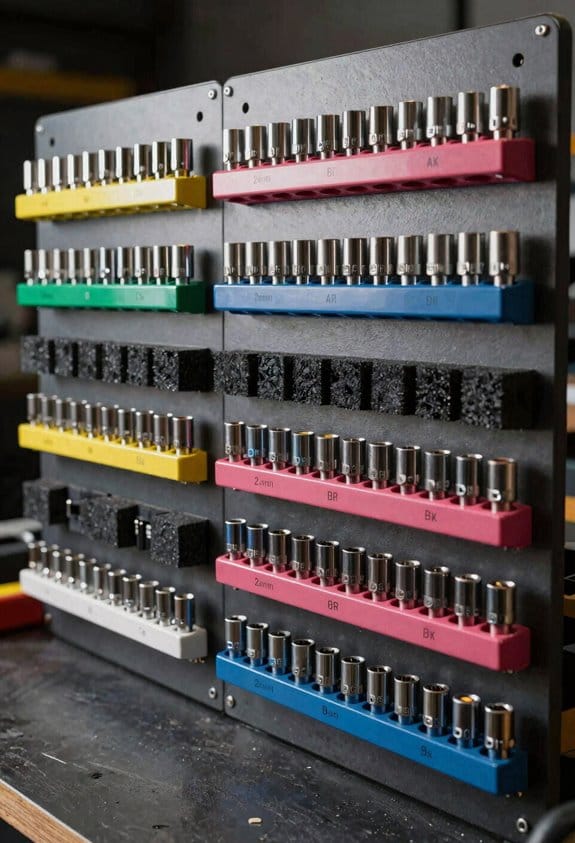
Once you’ve consolidated your tools into a single storage location, the next logical step involves separating metric and SAE tools into distinct sections, because mixing these two measurement systems creates unnecessary confusion during repairs. I’ve found that metric segregation prevents costly mistakes when working on vehicles requiring specific fastener types. Organizing wrenches, sockets, and other tools by measurement system keeps everything intuitive and accessible. Socket color coding enhances this strategy—I use blue labels for metric tools and red for SAE equipment. This visual distinction means I can grab the correct tool immediately without second-guessing sizes. Specialty items like triple square bits and torque wrenches also deserve separate storage. When your tools follow this systematic approach, you’ll work faster and more accurately.
Use Drawer Dividers to Sort by Tool Type
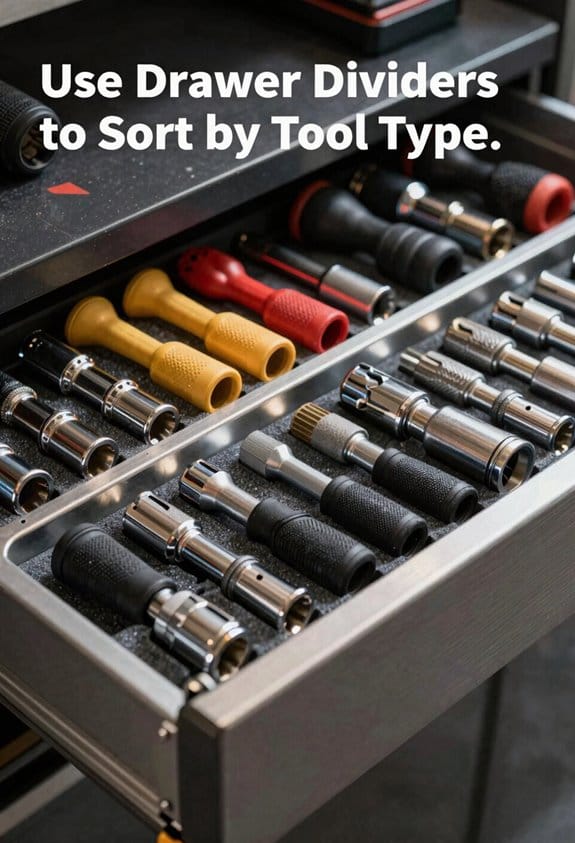
Building on the metric and SAE separation you’ve already established, drawer dividers become your next essential tool for maintaining order and efficiency within each section. I’ve found that dividing drawers by specific tool types—such as wrenches, sockets, screwdrivers, and pliers—dramatically reduces time spent searching during projects. Installing fixtures within each compartment keeps like-minded tools grouped together, enabling quick identification when you need them. Color coding drawers adds another organizational layer, helping you locate the right drawer instantly. Standardizing handle orientation, where all tool handles face the same direction, creates visual consistency and allows you to grab items without hesitation. This systematic approach transforms your tool chest into a functional workspace where everything has its designated place.
Add Pegboards and Shadow Boards to Prevent Loss
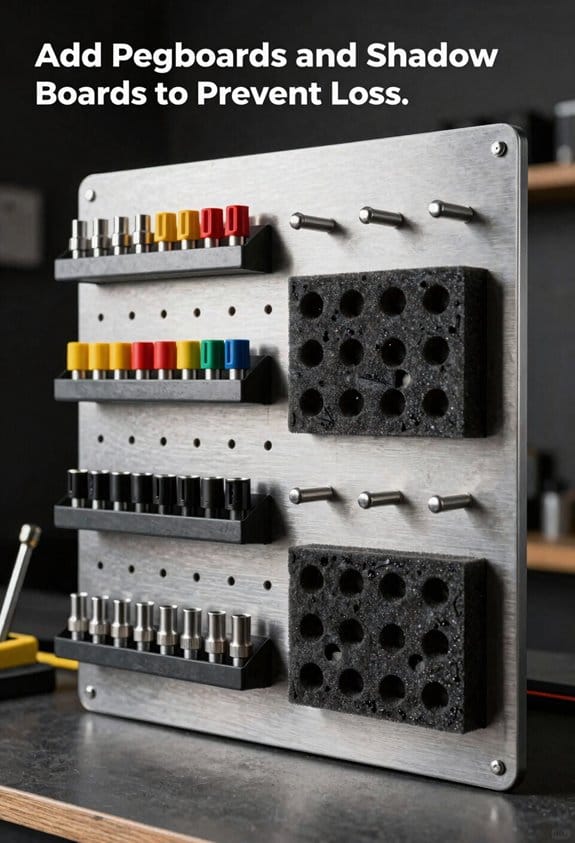
While drawer dividers keep your frequently used tools organized and accessible, pegboards and shadow boards take your organization system further by creating a visual inventory of your complete tool collection. I’ve found that pegboards display tools prominently on walls, making visual cues instantly recognizable when something’s missing. Shadow boards, which feature tool-shaped cutouts on a solid background, work similarly but offer a more permanent solution.
When you mount your tools on these systems, you’re fundamentally conducting continuous inventory audits. Each tool has a designated spot, so you’ll immediately notice if something’s misplaced or lost. This visibility transforms tool accountability from a chore into an automatic process. I recommend positioning these boards near your workstation where you can see them regularly, ensuring you’ll catch any gaps before they become problems.
Secure High-Value Tools in Locked, Dedicated Storage
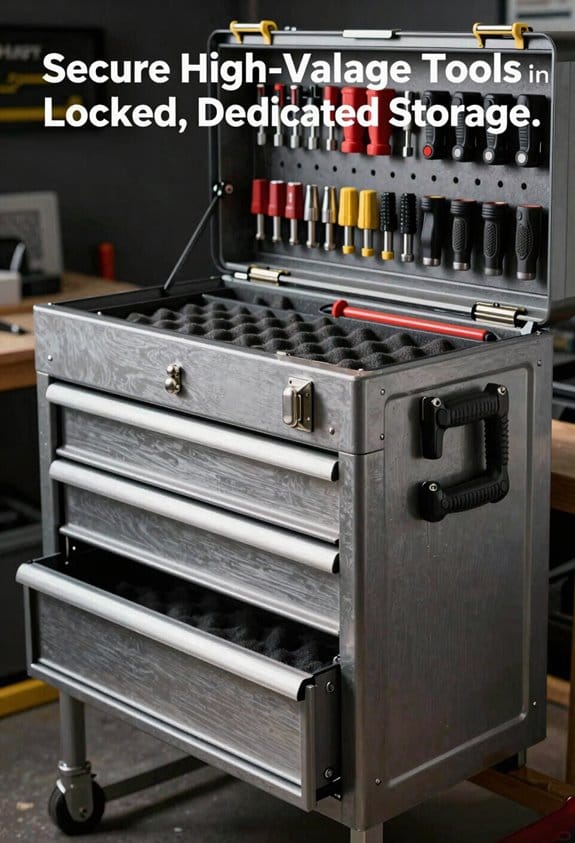
Moving beyond visual organization systems, high-value tools demand a different storage approach entirely. I’ve found that expensive diagnostic equipment, specialized torque wrenches, and precision instruments require lockable cabinets rather than open display. These secured storage units protect valuable investments from theft and damage, which matters notably in busy shop environments.
Discrete safes offer additional protection for particularly expensive items like digital multimeters and specialized diagnostic scanners. I keep documentation of serial numbers and purchase receipts separate from the tools themselves. This approach guarantees accountability while restricting access to authorized personnel only.
Stock Rolling Carts for Multi-Location Work
Once your high-value tools are secured in locked storage, you’ll want to focus on the tools you use frequently throughout your shop, which need a different kind of accessibility. Rolling carts let you transport essential tools directly to your work area, eliminating the need to walk back and forth constantly. I organize my cart with task trays that hold specific tools grouped by project type, so everything I need stays together. Including onboard chargers on the cart means my cordless tools stay powered without searching for outlets. After completing each task, I return the cart to its designated spot near the lift. This mobile system keeps my workspace efficient while preventing tools from getting lost during transport between stations.
Frequently Asked Questions
How Often Should Mechanics Reorganize Their Tool Chest Layout for Optimal Efficiency?
I’d recommend conducting monthly reviews to catch misplaced items and seasonal overhauls to reassess your layout. This keeps your organization system efficient and guarantees you’re not wasting time searching during projects.
What’s the Best Way to Label Drawers and Sections for Team Clarity?
I’d recommend using color coded labels paired with function specific tags on each drawer. This system lets you and your team instantly identify tool locations, reducing search time and preventing misplaced items during shared workspace situations.
How Can Mechanics Prevent Tool Damage When Storing Items in Drawers?
Studies show 30% of tool damage occurs during storage. I’d use padding inserts and magnetic trays to protect your items. They’ll prevent shifting, reduce scratches, and keep everything secure in drawers.
Should Specialty Tools Be Organized Differently Than Standard Everyday Mechanic Tools?
Yes, I’d recommend specialty segregation for your high-value items like torque bits and brake calipers. I keep usage tracking on these tools separately, storing them away from everyday wrenches so you’ll immediately notice if something’s missing.
What Climate Control Considerations Matter for Tool Chest Storage and Preservation?
You’ll want to maintain consistent temperature control and monitor humidity levels in your tool storage area. Fluctuating temperatures cause metal expansion and contraction, while excess moisture promotes rust on your valuable tools.


