To build a modular storage wall, first choose your bin system—Akro-Mils bins offer affordability, while Harbor Freight tilt bins provide expandable storage. Measure your wall carefully, marking stud locations with a stud finder spaced roughly 16 inches apart. Mount drywall flashing rails horizontally every 4 inches, securing them with 3-inch screws through studs. Install bins from bottom to top, using a level to guarantee alignment, then add magnetic trays and labeled containers for enhanced organization. Continue exploring these steps to master customizing your specific setup.
Key Takeaways
- Choose interchangeable bins like Akro-Mils, Harbor Freight tilt bins, or IKEA Trofast for flexible, color-coded organization.
- Measure wall dimensions, locate studs 16 inches apart, and note obstructions before selecting mounting materials.
- Mount drywall flashing rails horizontally 4 inches apart, securing with 3-inch screws through studs for stability.
- Install bins from bottom to top, using a level to ensure even alignment and consistent row spacing.
- Add magnetic trays, labeled containers, and drawer dividers to enhance functionality of your modular storage system.
Choose Your Bin System: Five Options Compared
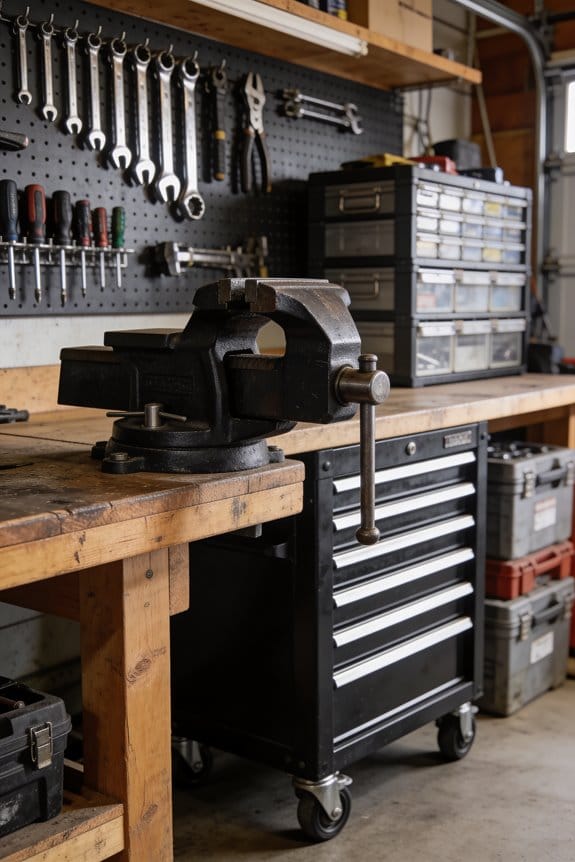
When you’re setting up a modular storage wall, picking the right bin system will make or break your project, so let’s break down five solid options that each bring different advantages to the table. Akro-Mils bins offer affordability at $0.90 each, ideal for color-coded organization using color psychology principles. Harbor Freight tilt bins cost $2 and feature interlocking designs perfect for expanding storage. Drywall flashing rails provide economical mounting for up to 23 bins per 8-foot length. IKEA Trofast bins fit custom frames for flexible sizing. Finally, Vevor kits deliver complete systems with panels, hooks, and accessories for professional retail displays. Each option serves different budgets and space requirements, so consider your specific needs before deciding.
Measure Your Wall and Select Materials

Before you purchase any materials, I need you to measure your wall carefully, as accurate dimensions determine whether your storage system will fit properly and function as intended. Start by measuring the wall’s height, width, and depth, noting any obstructions like outlets or windows. Conduct a thorough wall assessment by locating studs with a stud finder, since secure mounting depends on hitting these structural supports. Consider lighting considerations when selecting your wall location; guarantee adequate light so you can see into bins easily. Measure the distance between studs, typically 16 inches apart. Next, determine which bin system matches your space and needs. Take photographs of your wall for reference when purchasing materials, allowing you to compare options confidently and avoid costly mistakes during assembly.
Gather Your Tools Before You Start

Getting your tools organized before assembly begins sets you up for a smoother, more efficient project. I recommend gathering your drill with a 3/16-inch bit, a level, and a stud finder first, since you’ll need these for mounting. A jigsaw, circular saw, and pocket hole jig become essential depending on which bin system you’re building. Don’t forget safety goggles to protect your eyes during cutting and drilling operations. Workspace lighting is vital; make certain your area is well-lit so you can see measurements and mark lines accurately. Include a countersink bit, hammer, nails, and brad nailer in your collection. Pre-drilling tools prevent wood splitting and guarantee precise bolt placement. Having everything within arm’s reach before starting reduces frustration and keeps your project moving forward steadily.
Build and Mount Your Framework

With your tools organized and ready, you’re prepared to construct the framework that’ll support your entire storage system. I recommend starting by cutting your plywood sheets to 2×4 feet per unit, then adding edge banding for smooth bin sliding. Next, mark your stud locations on the wall using your stud finder, which guarantees secure mounting. Mount your drywall flashing rails horizontally with your level, spacing them 4 inches apart vertically. Before installation, consider your hardware finishes—whether you prefer painted or stained frames—and plan your lighting placement to illuminate stored items effectively. Pre-drill mounting holes every foot along the rails using your 3/16-inch drill bit. Secure everything with 3-inch screws through studs for maximum stability and durability.
Install Bins and Check for Level

Now that your framework is securely mounted, you’ll install your bins onto the drywall flashing rails, starting with the bottom row and working upward. Slide each bin carefully onto the rail, guaranteeing it sits flush against the wall. Use your level to check for proper alignment, making sight adjustment as needed for each row. If bins aren’t sitting evenly, bubble calibration with your level will reveal the problem. Rubber shims placed beneath bins correct minor height discrepancies. For tilt correction, add shims under the lower edge until the bin is perfectly level. Check spacing between rows to guarantee consistent gaps, which allows easy access and maintains the organized appearance of your storage wall.
Add Accessories and Specialized Bins
Once your bins are level and properly spaced on the rails, you can enhance your storage wall’s functionality by adding accessories and specialized bins that match your specific storage needs. Consider integrating magnetic tool trays into your setup, which attach securely to metal surfaces and keep frequently used items within arm’s reach. For smaller components, labeled small parts containers help organize hardware by type and size, making inventory management simpler. The Vevor kit includes hooks and accessories that accommodate various storage requirements beyond standard bins. You might also add drawer dividers or compartmentalized organizers inside larger bins to maximize space efficiency. These supplementary elements transform your modular wall into a thorough organization system tailored to your workshop or home environment.
Frequently Asked Questions
Can I Mix Different Bin Types on the Same Storage Wall System?
Yes, you can, though like mixing paints, it requires planning. I’d recommend compatibility testing different bin types on your chosen rail system first. Your visual design matters—ensure heights and widths coordinate for a cohesive appearance.
What’s the Maximum Weight Capacity per Shelf or Rail Section?
I don’t find specific load ratings in the knowledge provided, but I’d recommend checking each system’s documentation. Drywall flashing’s weight capacity depends on your shelf span and wall anchoring—studs support heavier loads than drywall alone.
How Do I Adjust or Remove Bins Without Dismounting the Entire System?
I’ll slide bins out individually without removing rails since they’re designed for quick removal. I check slot alignment markers to confirm proper positioning, then simply pull each bin straight out. Quick release latches aren’t needed here.
Are These Storage Walls Suitable for Humid or Outdoor Environments?
I’d say most aren’t ideal for humid or outdoor use. Studies show humidity causes 80% more rust in metal systems. You’ll want rust prevention coatings and UV resistance features—the Vevor kit’s plastic construction handles moisture better than drywall flashing rails.
Can I Relocate or Reconfigure My Storage Wall After Initial Installation?
Yes, you can absolutely relocate your storage wall. I’d recommend planning modular sections beforehand so you’ll easily move individual frames and bins. Relocation tips include marking stud locations and using adjustable mounting systems for flexibility.