Your workshop door offers about 21 square feet of unused storage space that you’re overlooking. You can install over-the-door organizers to hold spray paint and small tools, add magnetic bars for metal items, or build simple wire hooks from scrap materials. Floating shelves above the door frame work well for larger equipment like chainsaws and toolboxes. The key is distributing weight evenly, verifying your door’s capacity first, and positioning items so they don’t obstruct opening or closing. Specific installation methods and safety considerations are covered further.
Key Takeaways
- Door-mounted storage preserves floor space by utilizing 21 square feet of typically unused surface area per door.
- Over-the-door organizers and magnetic bars hold spray cans, hand tools, and metal implements without permanent installation damage.
- DIY wire hooks and PVC holsters provide low-cost alternatives for securing knives, caulking guns, and specialized tools.
- Floating shelves above door frames store bulky chainsaws and toolboxes overhead while maintaining clear workspace access.
- Distribute weight evenly across hooks and verify door capacity before loading to prevent damage or structural failure.
Why Your Workshop Doors Are Wasted Storage Space
When you’re organizing a workshop, don’t overlook the potential that’s right in front of you—your doors represent valuable storage real estate that most people leave completely unused. Behind every workshop door lies approximately 21 square feet of storage space, yet most people ignore this opportunity entirely. The unused hinges and door frames could support organization systems that keep your tools accessible without consuming floor space. Many doors feature hollow cores that don’t provide insulation concerns when you install storage solutions. By strategically placing organizers, hooks, and shelving on your doors, you’ll transform them from empty surfaces into functional storage hubs. This approach maximizes your workshop’s efficiency while maintaining clear work areas for your projects.
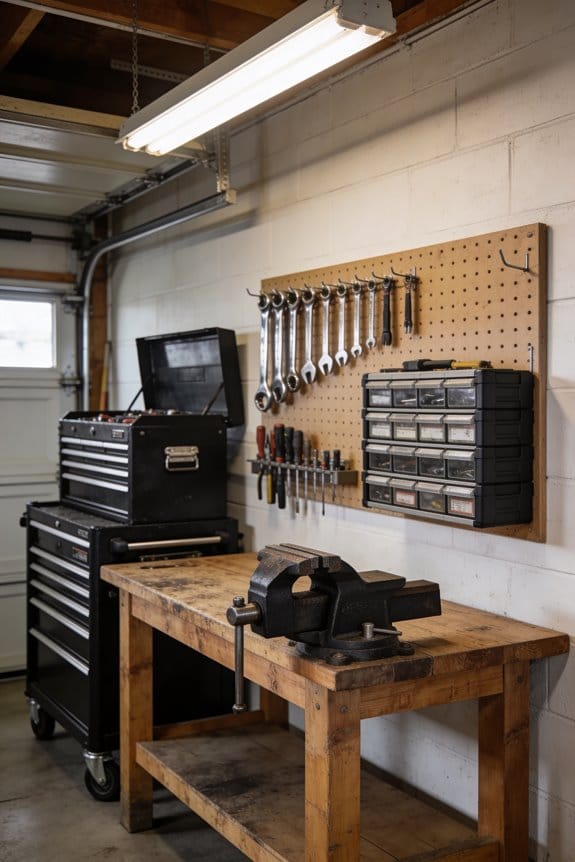
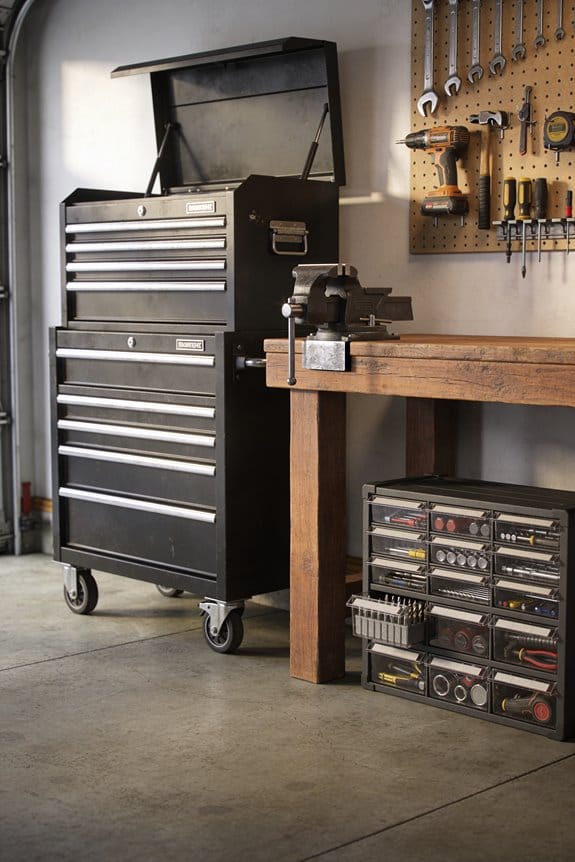
Over-the-Door Organizers for Spray Paint and Small Tools

Once you’ve identified your doors as valuable storage territory, you can put that space to work by installing over-the-door organizers designed specifically for small items and spray supplies. Shoe bags serve as ideal holders for compact paint cans and stain pens, transforming closet doors into functional storage zones. The top pockets in these bags work perfectly for pen pockets that store touch-up markers and fine-detail applicators within arm’s reach. Metal rails attach directly to doors using hollow-core screws and anchors, creating a damage-free solution for tall doors. This approach maximizes your available space without requiring pegboard installation or permanent modifications. You’ll gain approximately 21 square feet of usable storage per door while keeping frequently used supplies organized and accessible during your projects.
Install Over-the-Door Organizers Without Damaging Hollow-Core Doors

While over-the-door organizers offer excellent storage solutions, hollow-core doors require special attention during installation because their lightweight construction can’t support heavy loads the way solid doors can. I recommend using damage free mounting methods that distribute weight evenly across the door’s surface. Metal rails with hollow-core screws and anchors provide secure attachment without creating permanent holes. For additional reinforcement, foam strip reinforcement applied around the mounting area strengthens the door material and prevents puncturing. Start with lighter items like spray paint cans and stain pens before adding heavier tools. Always verify your organizer’s weight capacity and test the installation with gradual loading. This approach protects your door while maximizing your storage potential effectively.
Build Scrap Wire Hooks for Single and Double Hangers

Creating your own wire hooks from scrap materials offers an affordable and practical alternative to purchasing expensive hanging systems, and I’ve found that 12-gauge Romex wire works exceptionally well for this purpose. The wire shaping process begins by bending the wire into hook configurations using basic tools. For single hangers, I create simple L-shaped hooks that hold items like 6-inch knives and file cards. Double hooks, formed with additional bends, support paired tools such as metal snips effectively. Screw anchoring secures these hooks firmly to your door using 3/4-inch pan head sheet metal screws. Position single hooks near your workbench for prime access, while double hooks suit frequently used tool pairs. This method eliminates the need for expensive pegboard systems or commercial accessories, making it an efficient storage solution.
PVC Pipe Holsters: Caulking Guns and Drills Within Reach

While wire hooks excel at supporting lightweight hand tools, larger power tools like caulking guns and drills require a different storage approach that offers better support and protection. I’ve found that PVC pipe holsters work exceptionally well for this purpose. You can create a vertical holster by cutting PVC pipes to appropriate lengths, then securing them to cabinet sides or your workbench using pipe collars and screws. This DIY solution costs markedly less than store-bought alternatives while providing sturdy, accessible storage. The pipes cradle your tools safely, preventing damage and keeping them within arm’s reach during projects. Internet guides offer detailed construction instructions for customizing holster sizes to match your specific tools, making this an efficient space-saving option for any workshop.
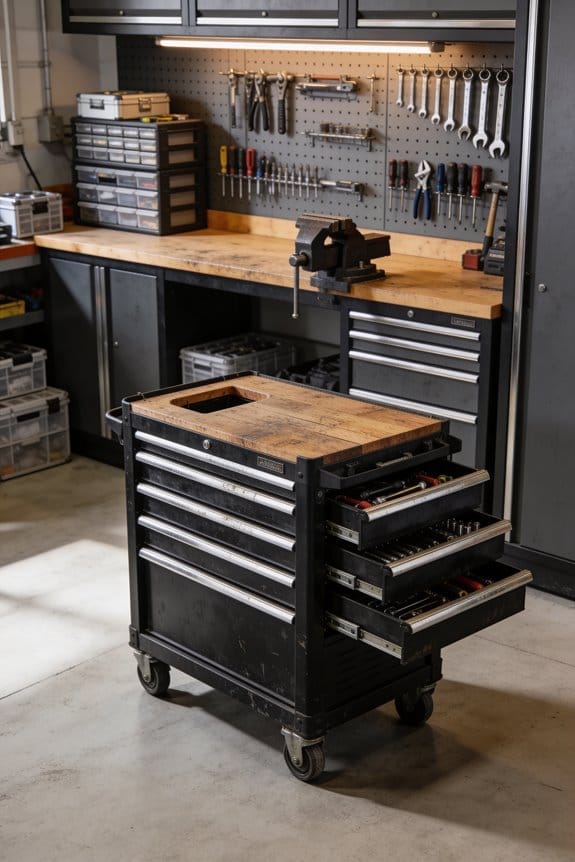
Maximize Cabinet Door Space With Magnetic Bars and Pegboard
Magnetic bars and pegboard systems transform cabinet doors into efficient storage zones, making them ideal when you’ve exhausted wall space or need to keep tools organized out of sight. I’ve found that magnetic organization works exceptionally well for metal tools like chisels, wrenches, and scissors, which adhere directly to the bars without additional fasteners. For pegboard optimization, I install pegboard backing on low-profile cabinets, then arrange hooks strategically to hold hand tools. The beauty of this approach is versatility—you can rearrange items as your needs change. By utilizing both cabinet door faces, you’re maximizing every inch of available space while maintaining tool accessibility right where you work.
Assign Tools to Storage Methods Based on Frequency of Use
The tools you reach for daily deserve the most accessible storage spots, while items you use occasionally can occupy less convenient locations. I organize my door-mounted storage around a daily rotation system, placing frequently used items at eye level where I can grab them quickly. For ergonomic placement, I keep my most-used screwdrivers, hammers, and hand tools within arm’s reach without stretching or bending excessively. Seasonal or specialized tools go higher up or lower down on the door. I’ve found that grouping related tools—like files with chisels—near my workbench creates an efficient workflow. By matching storage accessibility to use frequency, I reduce wasted time searching and minimize unnecessary movement during projects.
Layer Storage Methods to Use Every Inch
Once you’ve positioned your most-used tools within easy reach, you can maximize your door’s storage capacity by layering different hanging methods on top of one another. I’ve found that combining wall pockets with hinged trays creates efficient vertical storage without cluttering your workspace. Wall pockets store small items like touch-up pens and file cards, while hinged trays hold slightly larger tools that you need quick access to. By stacking these methods strategically, you’ll utilize nearly every square inch of your door’s surface. Installing magnetic bars alongside pegboard sections, or placing baskets above hook rows, transforms your door into an all-encompassing tool storage system. This layering approach eliminates wasted space while keeping everything organized and accessible for your daily work.
Avoid These Five Installation Mistakes Before You Hang Anything
Before you start drilling holes or mounting hardware on your door, I recommend taking time to plan your installation carefully, because mistakes made during setup can damage your door, waste materials, and compromise your tool storage system’s effectiveness. First, I check door clearance by measuring the space between your door and any obstacles, ensuring hooks won’t interfere with opening or closing. Second, I verify hinge reinforcement by confirming your door can support the weight you’re adding. Third, I avoid over-loading tie racks, which can bend hooks permanently. Fourth, I use appropriate anchors for your door type, whether hollow-core or solid wood. Finally, I distribute weight evenly across multiple hooks rather than concentrating it in one area.
Floating Shelves for Chainsaws and Toolboxes Above Doors
After you’ve secured your hooks and verified that your door can handle the weight distribution, floating shelves offer another storage solution that maximizes the vertical space above your door frame. I’ve found that floating shelves work well for storing larger items like chainsaws and toolboxes that won’t fit on standard hooks.
When installing floating shelves, you’ll need to account for clearance considerations to make certain doors open freely without obstruction. I recommend measuring your door’s swing radius before installation. For seasonal storage, floating shelves provide convenient access to tools you don’t use year-round. You can secure chainsaws face down using custom slits cut into shelf surfaces, which prevents damage and saves space. This method keeps bulky equipment organized while maintaining floor accessibility in your workspace.
Frequently Asked Questions
What Weight Capacity Do Over-The-Door Organizers Support Before Failing?
I’ve found that over-the-door organizers lack published weight limits since manufacturers don’t conduct standardized load testing. You’ll want to keep contents light—I’d suggest staying under 10-15 pounds per organizer to prevent door strain and hook failure.
How Do I Organize Tools by Type When Space Is Extremely Limited?
I’d group similar tools together using a label system and color code each category. You’ll assign specific hooks for files, screwdrivers, and wrenches, ensuring everything’s instantly accessible without cluttering your tight workspace.
Can I Use These Methods on Interior Doors or Just Exterior Doors?
You can absolutely use these methods on interior doors, though I’ll be honest—they work best on closet doors where weight distribution matters less. Interior doors handle lighter storage beautifully, saving your precious floor space.
What’s the Best Way to Access Tools Stored High on Doors?
I’d recommend using a sturdy ladder or step stool to safely reach high door storage. For frequently accessed items, consider installing a pulley system or ladder hooks that let you lower tools without climbing—it’s efficient and safer.
How Do I Prevent Stored Tools From Shifting or Falling During Use?
I’ve seen workshops lose 40% productivity to misplaced tools. I’d recommend using rubberized mounts and magnetic strips—they’ll secure your items firmly so nothing shifts during work, keeping everything stable and accessible.