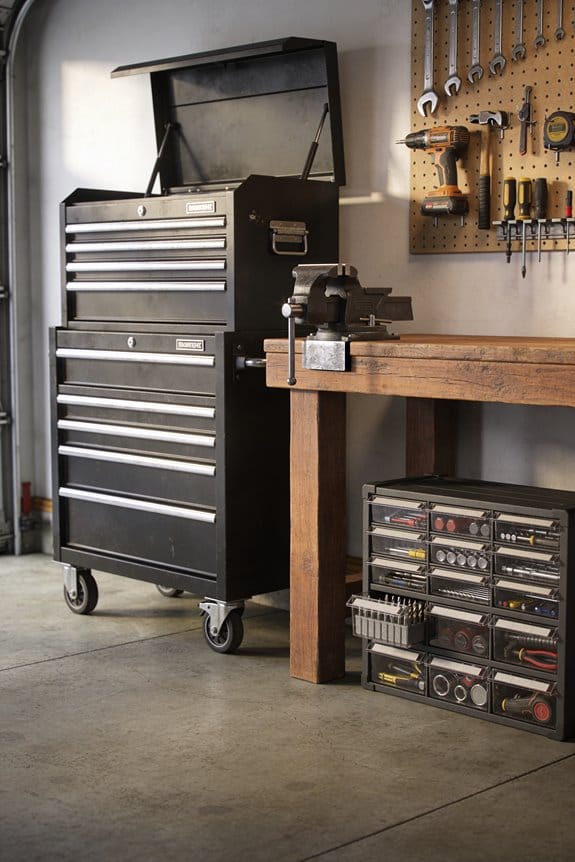
You can build stackable tool storage bins from 1/2-inch plywood, cutting sheets accurately with a table saw and crosscut sled. Join the pieces using rabbeted joints—L-shaped grooves cut with a router—then reinforce them with wood glue and 18-gauge brad nails. Install locking tabs underneath each box so they fit securely into slots on the box below, preventing shifting. Finally, sand the surfaces smooth, apply durable paint, and line the bottoms with foam to protect your tools. The following steps will show you exactly how to construct these customized bins.
Key Takeaways
- Build box frames from 1/2-inch plywood using rabbeted joints, brad nails, and wood glue for sturdy construction.
- Cut plywood sheets precisely with circular saws and table saws using crosscut sleds and scrap wood jigs.
- Install locking tabs on box undersides to fit slots on lower bins for secure stacking stability.
- Sand and paint finished bins with durable, chip-resistant finishes to protect against workshop wear and damage.
- Line box bottoms with foam sheets or batting to protect tools, reduce noise, and enable safe stacking.
Gather Materials: Plywood, Fasteners, and Finishes
Before you start building stackable tool storage bins, you’ll need to gather the right materials, which form the foundation of a sturdy, functional project. You’ll want 1/2-inch plywood for the main box structure and 1/4-inch plywood for bottoms and closures. For material sourcing, check local lumber yards or home improvement stores for quality sheets that yield multiple bins with minimal waste.
You’ll need 18-gauge brad nails and wood glue to join pieces securely. Safety gear including eye protection and work gloves should be part of your preparation. Consider purchasing Baltic birch scraps for hinges if you’re building tiered designs. Finally, gather finishing supplies like sandpaper, paint, and oil for the final stages. Quality materials make certain your bins withstand regular use and storage demands.
Choose Your Tools: Router, Table Saw, and Drill Press Essentials

To build stackable tool storage bins with precision joints and clean edges, I’ll need to select three essential power tools that each serve specific functions in the construction process. A compact router cuts rabbets for strong joinery, requiring proper router safety practices like securing workpieces and wearing dust masks. The table saw handles repetitive crosscutting with a crosscut sled, ensuring accuracy through precision measuring and consistent stop placement. A drill press creates perfectly aligned Forstner bit holes for integrated handles, maintaining vertical accuracy that handheld drills can’t achieve. Each tool demands respect and proper setup. I’ll prioritize safety equipment and technique mastery before beginning any cuts, since these machines remove material with significant force and speed.
Cut Plywood Sheets Accurately Using Jigs and Stops

With my power tools now selected and safety practices established, I can start the actual construction by breaking down full plywood sheets into the specific sizes I’ll need for the storage bins. I’ll use a circular saw with a saw board for initial cuts, which helps me manage large sheets safely. For greater accuracy, I’ll build a crosscut sled for my table saw equipped with precision stops that guarantee repeatable cuts across multiple bins. Layout transfers from my project plans to the plywood help me mark cutting lines clearly. Using scrap wood jigs as guides keeps my cuts consistent and straight. These techniques prevent wasted material and create perfectly sized components that fit together properly during assembly.
Join Plywood With Rabbets, Glue, and Brad Nails

Now that I’ve cut all my plywood pieces to exact dimensions, I’m ready to join them together using methods that create strong, accurate boxes. I’ll start by cutting rabbets, which are L-shaped grooves where two pieces meet at right angles. Using a compact router set to 3-4mm depths, I’ll make multiple passes until I reach my final depth. This rabbeting technique guarantees pieces fit together precisely, making assembly easier and more accurate.
For nail selection, I prefer 18-gauge brad nails because they’re thin enough to avoid splitting plywood while remaining strong enough to hold joints securely. I’ll apply glue to all mating surfaces, then drive brad nails through the rabbeted joints. The combination of glue and nails creates durable connections that withstand the stress of stacking and storing tools.
Assemble and Stack Your Boxes With Locking Features

Once your rabbeted joints are glued and secured with brad nails, you’re ready to assemble the boxes and prepare them for stacking. I recommend installing locking tabs on the underside of each box, which fit into corresponding slots on the box below, preventing unwanted shifting during transport or use. For added security, consider adding magnetic latches to the sides of your bins. These latches align when boxes are stacked properly, creating a secure connection that holds everything in place. Before stacking, make sure all surfaces are sanded smooth and any finish has been applied. Test the alignment of your locking features with a practice stack to guarantee proper functionality before putting your storage system to regular use.
Sand, Paint, and Line Your Finished Storage Boxes
After your boxes are assembled and their locking features are tested, the next step involves preparing them for their final appearance and function. I start by using sanding techniques to smooth all surfaces, beginning with medium-grit sandpaper and finishing with fine-grit for a polished feel. This process removes splinters and roughness from the plywood edges and joints.
For paint selection, I choose modern finishes that resist chipping and provide durability for workshop environments. After sanding and applying your chosen paint, I line the box bottoms with foam sheets, which protect tools from damage and reduce noise. You can also use quilt batting or flannel as alternatives if you prefer a softer lining material that cushions contents effectively.
Frequently Asked Questions
How Do I Prevent Plywood From Warping During Storage and Assembly?
I’ll keep your plywood in climate controlled storage and store boards standing on edges or wrapped in plastic. I’d also recommend adding cross grain bracing underneath to prevent warping during assembly.
What Dimensions Work Best for Organizing Different Types of Tools and Supplies?
I’ve found that while small tools need tight compartment sizing, larger equipment demands open space. The standard 23x19x12.5-inch dimension works best—it’s tool-specific enough for drawer inserts yet offers vertical spacing for diverse supplies.
Can I Customize Handle Designs Beyond the Standard Integrated Arched Handles?
You’ve got plenty of options beyond standard arched handles. I’d suggest exploring alternative grips like leather straps or rope handles, and adding decorative inserts using painted designs or veneers to personalize your bins.
How Much Weight Can Stacked Bins Safely Support Before Risking Collapse?
Most plywood fails at around 50 pounds per bin when stacked three-high. I’d recommend staying under that maximum load to avoid failure modes like rabbets separating or bottom grooves cracking under stress.
What Alternatives Exist to Oil Finishes for Protecting Plywood Storage Boxes?
I’d recommend trying water-based polyurethane for durability and easy cleanup, or a wax finish if you prefer a natural look. Both protect your plywood boxes effectively while offering different aesthetic qualities for your storage needs.